Site Maps
This article describes how to use the Site Maps feature within VOLO.
Introduction
Site Maps allow you to upload floor plans for the sites you manage in the VOLO system. These floor plans can then be used to display the doors and controllers for a site, showing them exactly where they are located on your uploaded floor plan.
This can be a great help for anyone performing maintenance on your site, as it allows them to quickly locate the controller they need to perform maintenance on. Additionally, it helps your staff to quickly locate the door they need to open or monitor without relying only on the name assigned to the door.
Create a Sitemap
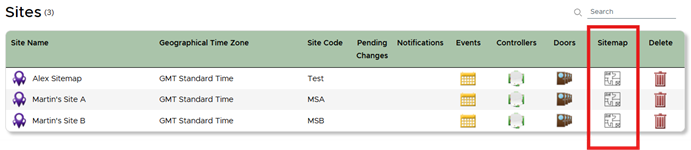
To upload a floor plan and create your first site map, you first need to navigate to the site maps page. You can access this from one of two places:
Firstly, you can navigate to the Sites page by using the Sites link at the top of the web page and then click on the
Sitemap image.
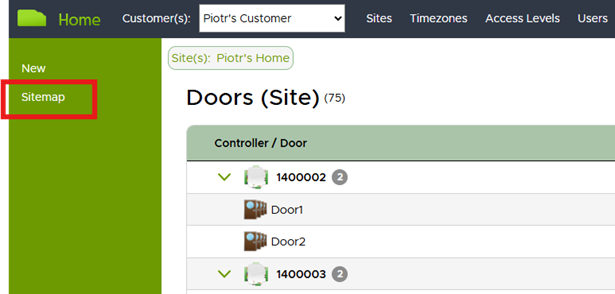
Alternatively, you can navigate to the Site Doors page, and then click on the Sitemap link in the left-hand navigation pane.
A page will appear allowing you to upload a new Floor Plan. There are limits to what can be uploaded (as shown on screen) and, additionally, a maximum of 10 floor plans per site can be uploaded:
tip
If you are struggling with image size, try using the Snipping Tool in Windows and save it as a JPEG. This will often create a smaller image than the original.
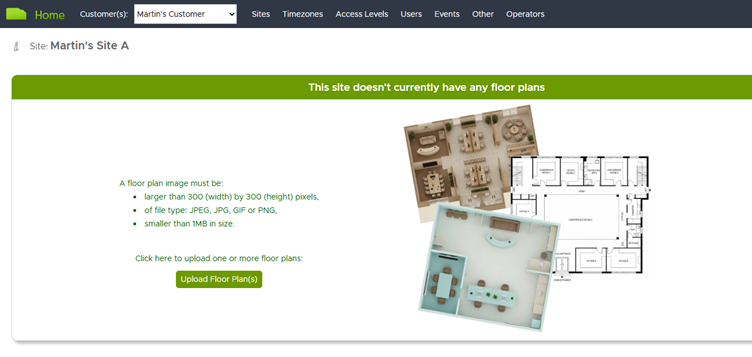
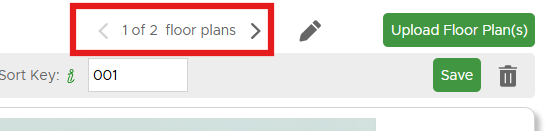
Select one or more images from the Windows explorer dialog. When the images have finished uploading, the floor plans will be created with temporary names. You can change these by editing the floor plan(s).
The sort key can also be amended, this is used for determining the order in which the floor plans are displayed.
Edit a floor plan
Editing your floor plans is necessary to get the most out of the feature. This will allow you to position the doors and controllers on the floor plan, as well as rename the floor plan to something more meaningful. You will also be able to adjust the sort key so that the images are presented in the most sensible order.
Click on the pencil icon to edit a floor plan. From here, doors and controllers can be selected and dragged on into position.
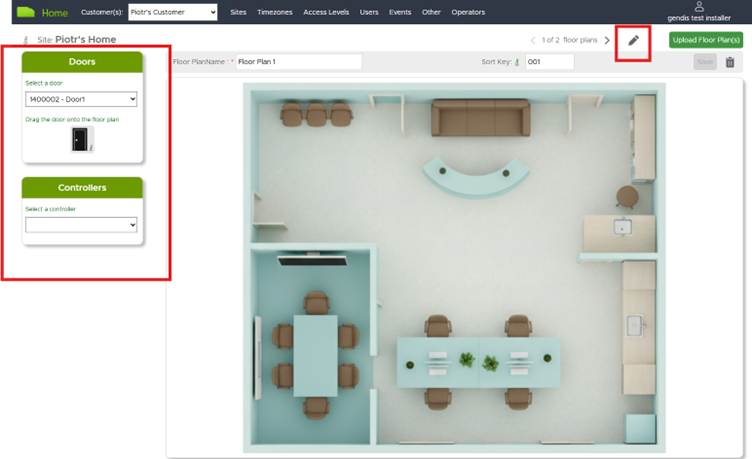
Once dragged on to the floor plan, the door name or controller serial number will appear above the respective image.

Hover over the info icon to display door or controller options.
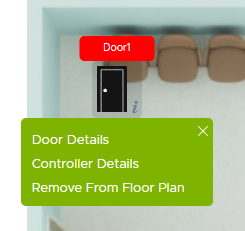
Clicking on Door Details or Controller Details, will open the respective page in a new browser tab.
Click Remove from Floor Plan to remove the image from the floor plan and return it to the list of doors / controllers
that can be selected (left-hand side).
You can close the options panel by clicking on the X icon (top right-hand corner of the green panel).
Save a floor plan
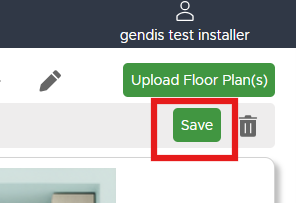
It is important to remember to click on the Save button after making any changes (i.e. changing Floor Plan Name, changing Sort Key, adding or removing images to/from the floor plan).
Delete a floor plan
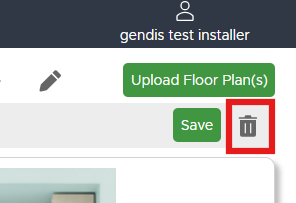
You can delete a floor plan by clicking on the trash can icon. All door and controller images will be removed from the floor plan when it is deleted (allowing them to be positioned again on another floor plan)..
Navigate between floor plans
When viewing a single floow plan, you can use the left and right arrow keys to switch between them.
Upload additional floor plans for a site
While in edit mode, you can click on the Upload Floor Plan(s) button to add more to the site. This works in the same way as the initial uploading of floor plan images for a site.

Display floor plan mode
The pencil icon is a toggle, so if you have finished editing (and any changes saved), clicking on the pencil icon will put the floor plan back into display mode.
tip
Refreshing the page while in edit mode will also return you to display mode. However, using the pencil icon to switch between the two will be faster.

Multi View Mode
You can reconfigure the view of the floor plans to show all of them in a vertically scrollable list, if you find this easier than switching left and right with the arrow buttons.
To do this, you need to click on the multiview icon while you are in display mode.

You can click on the single mode icon to exit multi view mode.

Display Events Mode
The Site Map feature also allows you to display events for doors on the Site. You can enable this by clicking on the events icon to display events on the right-hand side of the screen.
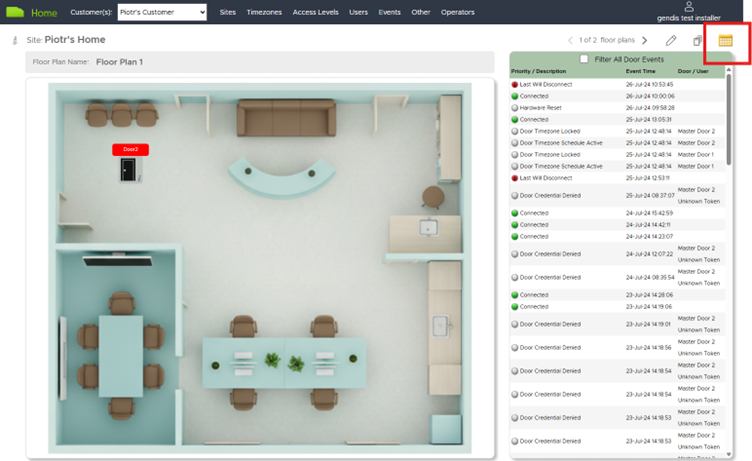
This works similarly to the standard events view (i.e. by default all events are displayed and any new events are automatically displayed).
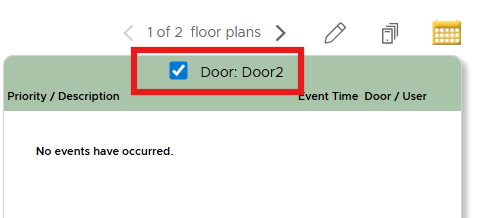
Filter Events
The events can be filtered to only display events for doors on the currently displayed floor plan or to display events for a specific door.
Click on the “Filter All Door Events” checkbox to only display events for doors that are on the currently displayed floor plan, as well as any fire alarm events.
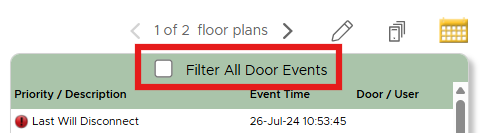
To filter for a specific door, hover over the info icon for the door in question and select Filter Door Events.

After selecting this option, the events pane will change to show the door and events.
Deselect the option to remove the filter.